Thursday, September 20, 2007
Friday, April 13, 2007
Transferring System Statistics to a TEST environment
Is it not possible to Gather System Stats in Production into a Staging Table , export the staging table to the Test environment and then import the Stats into the data dictionary in Test? Even if the above is possible , some key questions still remain while gathering System Stats into a Staging Table in Production -
a)is performance of Production impacted while System Stats is being gathered to a staging table?
b)SQL in the SGA invalidated ? - all documents that I have read so far tell me the answer is "No"
c)Since stats are gathered into a Staging Table , I am assuming no execution plans should change until stats are imported into the data dictionary in Production .
It will be great to know if any one has run into the same issue.
Wednesday, April 11, 2007
should we change sql to meet ANSI 99 standards
my 2 cents would be "No" - I really see the need to change the SQL if we were migrating say from Oracle to SQL Server for portability reasons. For the most bit Oracle version specific SQL development guides should be ANSI compliant and that should be enough - but then its just the way I have seen things work. Anyone run into the same issue - would be good to know.
Monday, February 26, 2007
A Strange Production Problem!!!
A Strange Production Problem!!!
I suddenly got a call that the Front end Applications have frozen (those are the worst calls….). I logged on to the database server, was unable to login to the database, at the same time got a call that the ……………….
Network Appliance filer experienced a kernel panic or a low-level system-related lockup. The device then rebooted itself to correct the problem and proceeded normally through the startup process.
The database was a 2node RAC Cluster both accessing the NetApp Device via NFS mount points. After the NetApp rebooted itself:
NodeA on the database looked fine: ORACM was up on the server, could login to the database from NodeA.
NodeB: ORACM was down, Instance on NodeB was down.
Net Result: Application was still unable to connect to either of the Nodes using TAF.
Since the Applications were anyways down, the decision was made to restart the Cluster Manager on both nodes and start both the instances. The above resumed operations fairly quickly (not too much time was spent on roll forward and rollback operations, we did not have any long running transactions at the time of abort).
An SR has been opened to discuss if the above was the expected behavior.
With RAC I would have expected the following to happen:
Each Oracle instance registers with the local Cluster Manager. The Cluster Manager monitors the status of local Oracle instances and propagates this information to Cluster Managers on other nodes. If the Oracle instance fails on one of the nodes, the following events occur:
1. The Cluster Manager on the node with the failed Oracle instance informs the Watchdog daemon about the failure.
2. The Watchdog daemon requests the Watchdog timer to reset the failed node.
3. The Watchdog timer resets the node.
4. The Cluster Managers on the surviving nodes inform their local Oracle instances that the failed node is removed from the cluster.
5. Oracle instances in the surviving nodes start the Oracle9i Real Application Clusters reconfiguration procedure.
The nodes must reset if an Oracle instance fails. This ensures that:
· No physical I/O requests to the shared disks from the failed node occur after the Oracle instance fails.
· Surviving nodes can start the cluster reconfiguration procedure without corrupting the data on the shared disk.
In 9i Cluster Reconfiguring is supposed to be fast remastering resources only if necessary and processes on Node A will be able to resume active work during reconfiguration as their locks and resources need not be moved.
However, this was not the behavior we saw when one node totally crashed in our case – while RAC is great it helps you load balance your requests – does it really help in Disaster Recovery ?
Tuesday, January 30, 2007
Informatica Step by Step to create a Simple Workflow Run successfully:
This post will cover a)How to create Repository User accounts and managing security in Informatica
b)Create a mapping , session, workflow and successfully execute a workflow
How to create Repository User accounts and managing security in Informatica
1) Login to Repository Server Admin console.Connect to the Repository Server
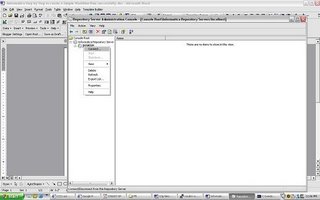 Right click and create new Repository
 4)give the following :
repository name
db connect string
db username : pcenter1
db password : pcenter1
license key information
when you click Apply the Repository content will get created.
5)Once the Repository is created loginto Repsoitory Manager
You can loginto the Repository either as
a) The Repository username/ password provided in the above step
b) Or Administrator
Go the Security > Manage Users and Privileges

By default 2 grps are created “Administrator” and “Public”
2 users are created “Administrator” and “Repository User”
Privileges tab lists all the privileges that are available. This security window can be used to manage Security and privileges – refer help guide for further information on security and privileges.
Create a mapping , session, workflow and successfully execute a workflow
I will use the HR schema to demonstrate how you can create a mapping, session and workflow. The HR schema has the following tables
COUNTRIES
DEPARTMENTS
EMPLOYEES
JOBS
JOB_HISTORY
LOCATIONS
REGIONS
COUNTRY_REGION is table that has country_name and region_name.
To populate the country_region table : is a join between the country table and the region table
To create a mapping:
Open Repository Manager – Connect to the Repository and create new folder within the Repository using Repository Manager.
Connect to Designer
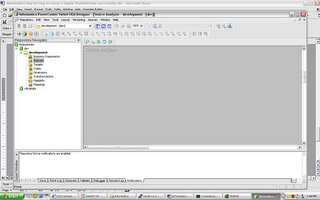 Open the folder up and you should see Sources, Targets , Cubes , Dimensions etc.
From the Sources menu import from source Database objects you need: in this case you will import COUNTRIES and REGION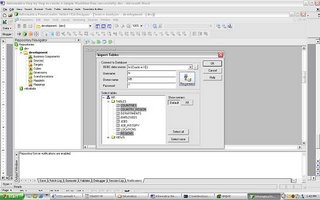 Open Warehouse Designer and Import TargetsImport COUNTRY_REGION from Target Menu.
 Sources and Targets Menu should be as above
Open Mapping Designer.
Drop in the sources to the Mapping Designer, Drop in the target as well to Mapping Designer.Include a Join Transform to join appropriately the COUNTRY and REGION table. Name the mapping as COUNTRY_REGION_MAPPING. While saving the mapping make sure parsing completed with no errors. Errors will be reported on the Output window of the Designer.
Once you have saved the Mapping you can now open up your Workflow Manager to create a session and a workflow. Tasks - Create - creates a new Session or Task
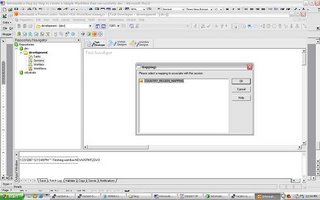 select the COUNTRY_REGION mapping and save the Repository.
Click on Connections/Relational to create 2 new connections for your Source and Target databases. once the connections are created Click on the Task and you should see the following properties window open up
 click on the Mappings Tab and verify the connections are set appropriately.
When you are ready to create the Workflow – Open Workflow Designer and drag and drop the mapping. Name the Workflow as COUNTRY_REGION_WORKFLOW
Save Repository and in the Output window verify that the workflow is valid.
Before you start running the workflow make sure to register the Power Center Server
Open Workflow Manager – Server – Server Registration give all the Power Center Server Registration Properties and define your PMRootDir

Click OK and , Right Click Server and assign the workflow you want to run using the Server. Once you have assigned the workflow to the server you can start the workflow – right click the workflow and click start

 workflow monitor should start indicating the status of the run
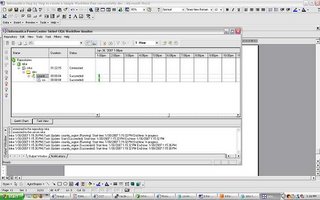 Right click the workflow and task and you should be able to view the workflow log and session log. From workflow Manager workflows can also be scheduled.
If you run into any issues running a workflow – feel free to post comments. The next 2 posts will cover a) versioning b)debugging using informatica.
Monday, January 29, 2007
Deployment Options with XML Publisher
XML Publisher (also called BI Publisher) has the following Deployment options
1) Oracle Applications (will not be discussed in this post)
2) XML Publisher Desktop Edition
Installs XML Publisher Template Builder in Microsoft word that helps you build templates for your Reports. The templates can be stored as rtf files. Following are the Source Data Options using Template Builder in word
a)XML File
b)SQL Query , needs connection information to source database
c)XML Schema
d)XML generated by Siebel Analytics Answers (I have not been able to get this to work , it may be something that will be available in the next releases and more easily integrated in the next few releases of Siebel Analytics)
3) XML Publisher Enterprise Edition
a)provides a web based console that can be used to publish multiple reports
b)XML Publisher enables you to define your reports and separate the data from the layout of the reports .
c)XML Publisher can run on any J2EE compliant Application Server
XML Publisher Desktop Edition:
If you have installed the Desktop Edition
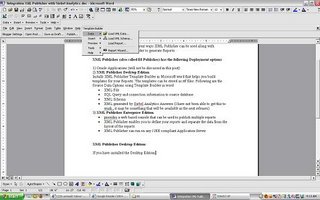 Template Builder Options will be available from MS Word menu.
Template Builder – Data – Load XML Data (XML File) , XML Schema , Report wizard (lets you give database connect information and the sql to extract the data)
Below will list a quick example on how the Report Wizard can be used (connecting to the hr schema to get a list of Departments)
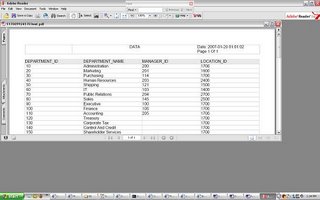
 give the database connect information and sql query for the data that needs to be retrieved.We will choose the Default Template Layout in this example.
 preview the Report and then save the RTF file (in this example we save the RTF file as hr_departments.rtf
 XML Publisher Enterprise Edition
As mentioned XML Publisher enterprise edition can run on any J2EE compliant Application Server.
The Admin and Reports directories are available under
Install_dir/xmlpserver
The following files have the port numbers used by the application.
HTTP Port 15101 install_dir/default-web-site.xml
RMI Port 15111 install_dir/rmi.xml
JMS Port 15121 install_dir/jms.xml
Default URL to access XML Publisher Application http://host:15101/xmlpserver (default username/pwd admin/admin)
create new folder and new Report in the corresponding folder.
Edit the Report to define the following properties:
i)datasource for the Report (new datasources can be created in the Admin window)
ii)Data Model: Define the sql query
iii)New List of Values: If the Report uses LOV’s

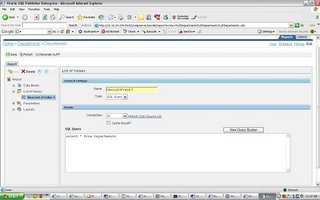 iv)Parameters: if any parameters are needed for the Report
v)Layouts: create a new template called hr_departments upload hr_departments.rtf and tie it to the hr_departments template.View the results
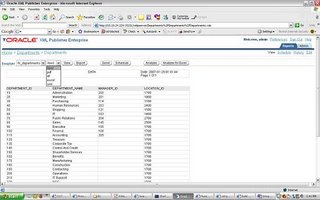 you can see that the template is chosen by default and the different output formats available. The above is a very simple illustration of how XML publisher will let your users design their own Reports(and manage changes to design templates of reports) while IT can focus on the data needed for the Reports and other important tasks.
Tuesday, January 23, 2007
Oracle Text 9i Bug searching XML Data
Searches with auto_section_group work in 9.2.0.6 but not for attributes within a tag. For example
Book title="A" author="B"
attributes title and author cannot be searched using auto_section_group section type in 9.2.0.6. The bug has been fixed in 9.2.0.8